2018 Dodge Charger SRT 392: A Closer Look at Specs

0

[ad_1]

In this article, we will delve deeper into the specifications of the 2018 Dodge Charger SRT 392. From its powerful engine to its sleek design, we will explore all the details that make this car stand out in its class.

What is the engine performance of the 2018 Dodge Charger SRT 392?

The 2018 Dodge Charger SRT 392 is equipped with a 6.4-liter V8 engine that produces an impressive 485 horsepower and 475 lb-ft of torque. This powerful engine allows the Charger SRT 392 to go from 0 to 60 mph in just 4.3 seconds, making it one of the fastest cars in its segment.

2018 Dodge Charger SRT 392

Additionally, the Charger SRT 392 comes with an 8-speed automatic transmission that provides smooth and seamless shifting, enhancing the overall driving experience. The combination of a robust engine and advanced transmission system ensures that the Charger SRT 392 delivers exceptional performance on the road.

What are the design features of the 2018 Dodge Charger SRT 392?

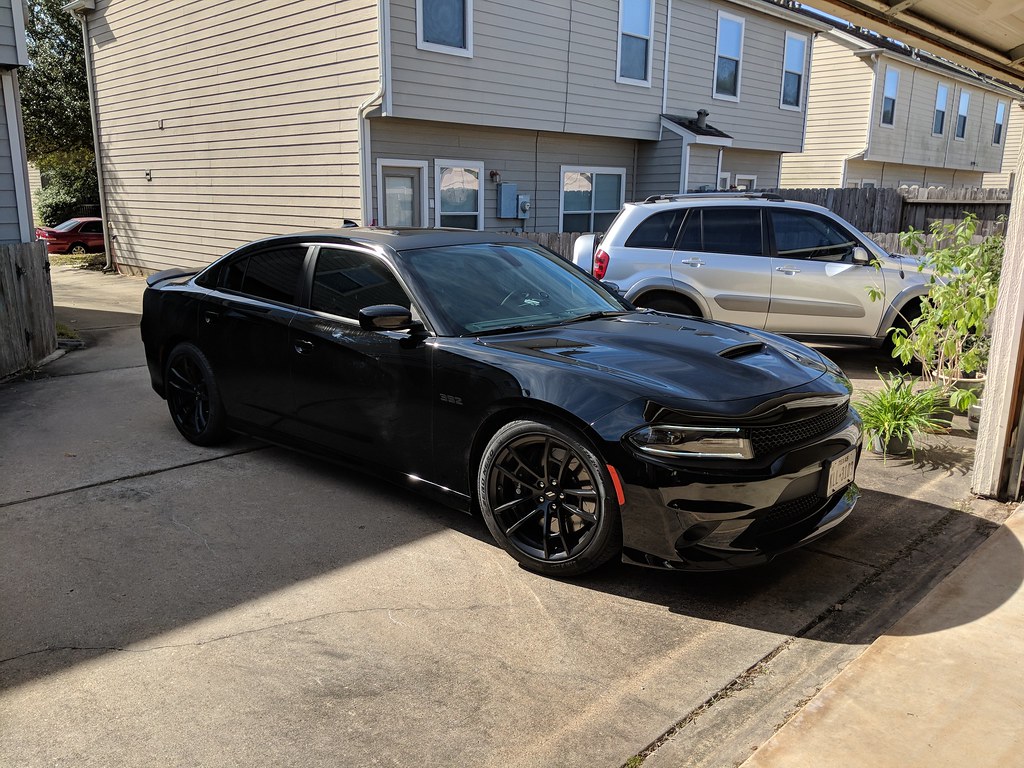
The 2018 Dodge Charger SRT 392 boasts a striking and aerodynamic design that sets it apart from other vehicles in its class. With its aggressive front grille, sculpted hood, and bold body lines, the Charger SRT 392 exudes a sense of power and sophistication.

Furthermore, the Charger SRT 392 comes with 20-inch forged aluminum wheels, Brembo brake calipers, and performance tires that ensure superior handling and control. The design of the Charger SRT 392 is not only stylish but also functional, enhancing both the aesthetics and performance of the vehicle.

What are the interior features of the 2018 Dodge Charger SRT 392?

The interior of the 2018 Dodge Charger SRT 392 is designed to provide a luxurious and comfortable driving experience. The Charger SRT 392 comes with premium leather seats, heated and ventilated front seats, and a leather-wrapped steering wheel with mounted controls for added convenience.

Moreover, the Charger SRT 392 features an 8.4-inch touchscreen infotainment system with Apple CarPlay and Android Auto compatibility, allowing drivers to easily access their favorite music, navigation, and apps. The interior of the Charger SRT 392 is not only stylish but also functional, making every drive a pleasurable experience.

What are the safety features of the 2018 Dodge Charger SRT 392?

The 2018 Dodge Charger SRT 392 comes equipped with a range of advanced safety features to ensure the safety of both the driver and passengers. The Charger SRT 392 features an electronic stability control system, adaptive cruise control, blind-spot monitoring, and rear cross-traffic alert.

Additionally, the Charger SRT 392 comes with a comprehensive airbag system, including front, side, and curtain airbags, to provide maximum protection in the event of a collision. The safety features of the Charger SRT 392 prioritize the well-being of everyone on board, making it a reliable and secure vehicle.

What is the fuel efficiency of the 2018 Dodge Charger SRT 392?

Despite its powerful engine and performance capabilities, the 2018 Dodge Charger SRT 392 offers decent fuel efficiency for a vehicle of its kind. The Charger SRT 392 has an EPA-estimated fuel economy of 15 mpg in the city and 25 mpg on the highway, making it a practical choice for daily driving.

Furthermore, the Charger SRT 392 features an active exhaust system that allows drivers to customize the sound of their vehicle while also optimizing fuel efficiency. With a balance of power and efficiency, the Charger SRT 392 offers a well-rounded driving experience.

2018 Dodge Charger SRT 392

Conclusion

The 2018 Dodge Charger SRT 392 is a high-performance sedan that offers a perfect blend of power, style, and comfort. With its impressive engine performance, striking design, luxurious interior, advanced safety features, and decent fuel efficiency, the Charger SRT 392 is a top choice for enthusiasts seeking a thrilling driving experience.

FAQs

1. Does the 2018 Dodge Charger SRT 392 offer advanced technology features?

Yes, the 2018 Dodge Charger SRT 392 comes equipped with an 8.4-inch touchscreen infotainment system that includes Apple CarPlay and Android Auto compatibility for seamless connectivity.

2. Is the 2018 Dodge Charger SRT 392 a safe vehicle?

Absolutely, the Charger SRT 392 features advanced safety features such as blind-spot monitoring, adaptive cruise control, and a comprehensive airbag system to ensure the safety of all occupants.

3. What is the fuel efficiency of the 2018 Dodge Charger SRT 392?

The Charger SRT 392 has an EPA-estimated fuel economy of 15 mpg in the city and 25 mpg on the highway, making it a practical option for daily driving.

4. How does the 2018 Dodge Charger SRT 392 compare to its competitors?

The Charger SRT 392 stands out for its powerful engine, stylish design, luxurious interior, and advanced safety features, making it a formidable competitor in its segment.

5. What sets the 2018 Dodge Charger SRT 392 apart from other vehicles in its class?

The Charger SRT 392 sets itself apart with its exceptional engine performance, striking design, comfortable interior, advanced safety features, and decent fuel efficiency, making it a well-rounded and desirable choice for drivers.


[ad_2]

2018 Dodge Charger SRT 392

A Guide to the Vacuum Hose Diagram for the Triton Ford 5.4

0

[ad_1]

In this article, we will discuss the importance of the vacuum hose diagram for the Triton Ford 5.4 engine. We will walk you through the process of locating and understanding this diagram, and explain how it can help you maintain and troubleshoot your Ford vehicle more effectively.

vacuum hose diagram for the Triton Ford

What is a Vacuum Hose Diagram?

A vacuum hose diagram is a visual representation of the various vacuum hoses in your vehicle’s engine. These hoses play a crucial role in maintaining optimal engine performance by carrying vacuum pressure to different parts of the engine. The diagram shows the path of these hoses and where they connect to specific components such as the intake manifold, EGR valve, and brake booster.

By referencing the vacuum hose diagram, you can easily identify and locate the hoses in your Triton Ford 5.4 engine, making it easier to inspect, replace, or repair them when needed.


How to Locate the Vacuum Hose Diagram for the Triton Ford 5.4?

The vacuum hose diagram for the Triton Ford 5.4 engine is typically located in the vehicle’s owner’s manual. If you do not have access to the manual, you can also find the diagram online through various Ford resources or automotive forums. Alternatively, you can visit a Ford dealership or consult with a certified mechanic for assistance.

Once you have located the vacuum hose diagram, take the time to study it carefully and familiarize yourself with the layout. Note the different hose colors and sizes, as well as the connection points to the engine components. This will help you understand the vacuum system better and identify any potential issues more efficiently.

vacuum hose diagram for the Triton Ford


Why is the Vacuum Hose Diagram Important for Maintenance?

The vacuum hose diagram is essential for the proper maintenance of your Triton Ford 5.4 engine because it serves as a roadmap for troubleshooting vacuum-related problems. With the diagram, you can quickly pinpoint any leaks, blockages, or disconnected hoses that may be affecting engine performance.

Regularly inspecting and following the vacuum hose diagram can help prevent more significant issues down the line, such as engine misfires, rough idling, or decreased fuel efficiency. By keeping the vacuum system in top condition, you can ensure your Ford vehicle runs smoothly and efficiently.


How to Interpret the Vacuum Hose Diagram?

Interpreting the vacuum hose diagram for the Triton Ford 5.4 engine may seem daunting at first, but with a little patience and understanding, it becomes much more manageable. Start by identifying the main components, such as the intake manifold, PCV valve, and vacuum reservoir.

Next, follow the lines and connections on the diagram to trace the paths of the vacuum hoses throughout the engine bay. Note any junctions or branching points where hoses split off and connect to different components. Understanding this layout will help you troubleshoot issues and make necessary repairs with confidence.

Conclusion

In conclusion, the vacuum hose diagram for the Triton Ford 5.4 engine is a valuable tool for maintaining and troubleshooting your vehicle’s vacuum system. By familiarizing yourself with the diagram and understanding how it works, you can identify and resolve issues more efficiently, keeping your Ford running smoothly for years to come.

FAQs

1. Where can I find the vacuum hose diagram for my Triton Ford 5.4 engine?

You can typically find the vacuum hose diagram in your vehicle’s owner’s manual or online through Ford resources.

2. Why is it important to follow the vacuum hose diagram during maintenance?

Following the diagram helps you identify and resolve vacuum-related issues that can affect engine performance and efficiency.

3. Can I use the vacuum hose diagram to troubleshoot other Ford engines?

While the diagram may vary slightly for different Ford engines, the basic principles can still apply to troubleshooting vacuum systems.

4. What are some common signs of vacuum hose problems in a Triton Ford 5.4 engine?

Common signs include rough idling, engine misfires, decreased fuel efficiency, and potential check engine light warnings.

5. How often should I inspect the vacuum hoses in my Ford vehicle?

It is recommended to inspect the vacuum hoses during regular maintenance checks or whenever you notice any performance issues with your vehicle.


[ad_2]

vacuum hose diagram for the Triton Ford

2008 Dodge Avenger Fuse Box Diagram: A Comprehensive Guide

0

[ad_1]

In this article, we will provide a comprehensive guide to the 2008 Dodge Avenger Fuse Box Diagram. We will discuss the different fuses and their functions, as well as provide a detailed diagram to help you identify and replace any blown fuses. Whether you are a car enthusiast or simply want to understand your vehicle better, this article will help you navigate the fuse box of your 2008 Dodge Avenger.

2008 Dodge Avenger Fuse Box Diagram

What are the functions of the different fuses in the 2008 Dodge Avenger?

The fuse box in the 2008 Dodge Avenger contains various fuses that are designed to protect different components of the vehicle. These fuses are responsible for controlling the electrical systems, such as the headlights, power windows, and radio. When a particular component malfunctions, it could be due to a blown fuse. By understanding the functions of the different fuses, you will be able to troubleshoot and address any electrical issues in your car.

Some of the common functions of the fuses in the 2008 Dodge Avenger include protecting the air conditioning system, controlling the power windows, managing the interior lights, and regulating the ignition system. Each fuse is labeled with a specific function, making it easier for car owners to identify which fuse corresponds to which component of the vehicle.

Where is the fuse box located in the 2008 Dodge Avenger?

The fuse box in the 2008 Dodge Avenger is located in the engine compartment. It is commonly positioned near the battery and is easily accessible. The fuse box contains a cover that can be removed to reveal the fuses and their corresponding diagram. It is important to refer to the diagram to accurately identify the fuses and their functions.

Some models of the 2008 Dodge Avenger may also have a secondary fuse box located in the interior of the vehicle, typically under the dashboard or near the driver’s side door. This secondary fuse box is designated for specific components, so it is essential to consult the owner’s manual for the exact location.

2008 Dodge Avenger Fuse Box Diagram

How can I identify and replace a blown fuse in the 2008 Dodge Avenger?

To identify and replace a blown fuse in the 2008 Dodge Avenger, you will need to refer to the fuse box diagram. The diagram provides a visual representation of the different fuses and their corresponding functions, allowing you to pinpoint which fuse needs to be replaced. Once the blown fuse is identified, you can use a fuse puller or a pair of needle-nose pliers to carefully remove the damaged fuse.

After removing the faulty fuse, you can refer to the diagram to find the appropriate replacement fuse. It is crucial to use a fuse with the same amp rating to avoid damaging the electrical system. Once the replacement fuse is installed, you can reattach the fuse box cover and test the corresponding component to ensure that it is functioning properly.


What are some tips for maintaining the fuse box in the 2008 Dodge Avenger?

Proper maintenance of the fuse box in the 2008 Dodge Avenger is essential to ensure the electrical systems operate smoothly. One important tip is to regularly check the fuses for any signs of damage or wear. This can be done during routine vehicle inspections or when troubleshooting electrical issues.

It is also crucial to keep the fuse box cover securely in place to protect the fuses from dirt, moisture, and other debris. Additionally, it is advisable to familiarize yourself with the fuse box diagram and keep a supply of spare fuses with the appropriate amp ratings on hand for quick replacements.

2008 Dodge Avenger Fuse Box Diagram

Conclusion

In conclusion, understanding the fuse box diagram of the 2008 Dodge Avenger is crucial for maintaining and troubleshooting the electrical systems of the vehicle. By familiarizing yourself with the functions of the different fuses, as well as the location and replacement process, you can effectively address any electrical issues that may arise. Proper maintenance of the fuse box is also essential for optimal vehicle performance.

FAQs

1. Can I use a fuse with a higher amp rating as a replacement?

No, it is not recommended to use a fuse with a higher amp rating as a replacement, as this can lead to electrical damage and pose a safety hazard. Always use a fuse with the same amp rating as the original one.

2. What should I do if I cannot locate the fuse box in my 2008 Dodge Avenger?

If you are unable to locate the fuse box in your 2008 Dodge Avenger, consult the owner’s manual for detailed instructions and diagrams. In some cases, the fuse box may be hidden or located in an unconventional area.

3. Are there any precautions I should take when handling fuses?

When handling fuses, it is important to disconnect the vehicle’s battery to prevent electrical shock. Additionally, always handle the fuses with care and avoid touching the metal components to reduce the risk of damage.

4. What are the signs of a blown fuse in the 2008 Dodge Avenger?

Some common signs of a blown fuse include non-functioning electrical components, such as the headlights, power windows, or radio. If you notice one or more components not working, it is advisable to check the fuses for any signs of damage.

5. Can I replace a fuse on my own, or should I seek professional assistance?

Replacing a fuse in the 2008 Dodge Avenger is a relatively simple process that can be done on your own. However, if you are unsure or uncomfortable with handling electrical components, it is best to seek professional assistance to avoid any potential risks.


[ad_2]

2008 Dodge Avenger Fuse Box Diagram

Tesla Charging Error: No Power

0

[ad_1]

In this article, we will discuss the common issue of Tesla cars encountering a Tesla charging error: No Power is available. We will cover the possible reasons for this issue and provide troubleshooting tips to help you resolve it.

What are the possible reasons for Tesla charging error: no power?

There are several potential reasons for a Tesla car to encounter a charging error with no power available. One possible reason could be a fault in the power supply at the charging station. If the charging station is not functioning properly, it may not provide the necessary power to charge the car. Another possible reason could be a malfunction in the car’s charging port or cable, preventing the car from receiving power from the charging station. Additionally, issues with the car’s battery or charging system could also lead to a charging error with no power.Tesla charging error: No Power

How can I troubleshoot the charging error: no power issue?

If you encounter a charging error with no power available, there are several steps you can take to troubleshoot the issue. First, try using a different charging station to see if the problem persists. The issue may be with the original charging station if the car charges successfully at a different station. You can also check the charging port and cable for any visible damage or debris that may be preventing a proper connection. Additionally, you can try restarting the car’s charging system by initiating a reset through the car’s display screen. If these steps do not resolve the issue, it may be necessary to contact Tesla customer support for further assistance.

What should I do if my Tesla car still won’t charge after troubleshooting?

If you have attempted troubleshooting the charging error with no power issue and your Tesla car still won’t charge, it is advisable to contact Tesla customer support for assistance. The support team can help diagnose the issue and determine whether any repairs or replacements are necessary. They may also be able to provide alternative charging options in the meantime, such as access to Tesla Superchargers or other compatible charging stations while the issue is being addressed.

Are there any preventive measures to avoid a charging error: no power?

While some charging errors with no power may be unavoidable due to external factors such as faulty charging stations, there are some preventive measures you can take to minimize the risk of encountering this issue. Regularly inspecting and maintaining the car’s charging port and cable can help prevent potential connectivity issues. Ensuring that the car’s software is up to date and performing regular maintenance checks on the battery and charging system can also help identify and address any potential issues before they become more serious.

Tesla charging error: No Power

Conclusion

Encountering a charging error with no power can be a frustrating experience for Tesla car owners, but by understanding the potential reasons for this issue and following the proper troubleshooting steps, it is possible to resolve the issue and get back to charging your car efficiently. If you encounter this issue despite troubleshooting, do not hesitate to contact Tesla customer support for further assistance.

FAQs

Q: Can a faulty charging station cause a Tesla car to encounter a charging error with no power?

Yes, a faulty charging station may prevent a Tesla car from receiving the necessary power to charge. If you encounter this issue, try using a different charging station to see if the problem persists.

Q: What should I do if my Tesla car still won’t charge after troubleshooting?

If your Tesla car still won’t charge after troubleshooting, it is advisable to contact Tesla customer support for assistance. They can help diagnose the issue and determine whether any repairs or replacements are necessary.

Q: Are there any preventive measures to avoid encountering a charging error: no power?

Regularly inspecting and maintaining the car’s charging port and cable, ensuring the car’s software is up to date, and performing regular maintenance checks on the battery and charging system can help minimize the risk of encountering this issue.

Q: How can I restart the car’s charging system if I encounter a charging error: no power?

You can try initiating a reset through the car’s display screen to restart the charging system and troubleshoot the issue.

Q: Can Tesla customer support provide alternative charging options if my car won’t charge?

Yes, Tesla customer support may be able to provide access to Tesla Superchargers or other compatible charging stations while the issue is being addressed.


[ad_2]

Tesla charging error: No Power

The Rise of Tesla 10.69.25.2: A Game-Changer in the Electric Vehicle Industry

0

[ad_1]

Welcome to our article on The Rise of Tesla 10.69.25.2, a game-changer in the electric vehicle industry. In this article, we will discuss the impact of Tesla‘s latest model on the electric car market, its key features, and the future of electric vehicles.

What makes Tesla 10.69.25.2 a game-changer in the electric vehicle industry?

Tesla 10.69.25.2 has revolutionized the electric vehicle industry with its groundbreaking technology and performance. Its long-range battery, fast charging capabilities, and advanced autopilot system set it apart from other electric cars on the market. With impressive acceleration and sleek design, Tesla 10.69.25.2 has changed the perception of electric vehicles and proven that they can be both sustainable and high-performing.

The introduction of Tesla 10.69.25.2 has also forced traditional car manufacturers to step up their game and invest more in electric vehicle technology. This model has raised the bar for electric cars and accelerated the shift towards sustainable transportation.

Tesla 10.69.25.2, a game-changer

How does Tesla 10.69.25.2 compare to other electric vehicles?

When compared to other electric vehicles, Tesla 10.69.25.2 stands out for its superior range, speed, and technology. Its long-range battery allows for extended driving without the need for frequent recharging, while its fast charging capabilities make it convenient for long road trips. The advanced autopilot system sets Tesla 10.69.25.2 apart from its competitors, offering a level of autonomous driving that is unparalleled in the electric vehicle market.

Furthermore, Tesla’s extensive network of Supercharger stations ensures that Tesla 10.69.25.2 owners have access to convenient and reliable charging infrastructure, addressing one of the main concerns of electric car drivers. Its sleek design and high-performance features make it a top choice for those looking for a stylish and sustainable vehicle.

What does the future hold for Tesla and the electric vehicle industry?

As Tesla continues to innovate and expand its product line, the future looks bright for the company and the electric vehicle industry as a whole. With the development of new battery technology, advancements in autonomous driving, and the increasing demand for sustainable transportation, Tesla is well-positioned to lead the way in the electrification of the automotive industry.

Furthermore, the growing awareness of climate change and the need to reduce carbon emissions has led to a shift in consumer preferences towards electric vehicles. This trend is likely to drive further innovation and investment in the electric vehicle market, with Tesla at the forefront of this movement.

Conclusion

In conclusion, the rise of Tesla 10.69.25.2 has had a significant impact on the electric vehicle industry, setting new standards for performance, technology, and sustainability. With its game-changing features and influence on the market, Tesla 10.69.25.2 has solidified its position as a leader in the electric vehicle industry and paved the way for the future of sustainable transportation.

Tesla 10.69.25.2, a game-changer

FAQs

1. What sets Tesla 10.69.25.2 apart from other electric vehicles?

Tesla 10.69.25.2 stands out for its superior range, speed, and technology, along with its advanced autopilot system and extensive network of Supercharger stations. Its combination of high performance and sustainability makes it a game-changer in the electric vehicle market.

2. How does Tesla 10.69.25.2 impact the future of the electric vehicle industry?

Tesla 10.69.25.2 has played a significant role in driving innovation and investment in electric vehicle technology, helping to accelerate the shift towards sustainable transportation. Its influence on the market has forced traditional car manufacturers to invest more in electric vehicles and raised consumer awareness of the benefits of sustainable transportation.

3. What are the key features of Tesla 10.69.25.2?

The key features of Tesla 10.69.25.2 include its long-range battery, fast charging capabilities, advanced autopilot system, and sleek design. These features set it apart from other electric vehicles and have redefined the standards for performance and technology in the electric vehicle industry.

4. How is Tesla leading the way in the electrification of the automotive industry?

Tesla’s continued innovation and expansion of its product line, along with the development of new battery technology and advancements in autonomous driving, have positioned the company as a leader in the electrification of the automotive industry. Its commitment to sustainability and high-performance vehicles has made it a driving force in the shift towards electric transportation.

5. What does the future hold for Tesla and the electric vehicle industry?

The future looks promising for Tesla and the electric vehicle industry, with growing consumer demand for sustainable transportation and ongoing technological advancements in electric vehicle technology. Tesla’s leadership in the market and its influence on the industry are likely to drive further growth and innovation in the electric vehicle market.


[ad_2]

Tesla 10.69.25.2, a game-changer

Dodge Ram: Converting from 8 Cylinder to 4 Cylinder

0

[ad_1]

In this article, we will be discussing the process of Dodge Ram: Converting from 8 Cylinder to 4 Cylinder. We will explore the reasons for making this conversion, the steps involved, and the potential benefits and drawbacks. Whether you are considering this conversion for improved fuel efficiency or simply want to experiment with your vehicle, this article will provide you with the information you need to make an informed decision.

Why would someone want to convert a Dodge Ram from 8 cylinders to 4?

There are several reasons why someone might want to convert their Dodge Ram from an 8-cylinder engine to a 4-cylinder. One of the most common reasons is to improve fuel efficiency. 4-cylinder engines are generally more fuel-efficient than 8-cylinder engines, so converting to a 4-cylinder engine can help save money on gas in the long run. Additionally, some individuals may be interested in experimenting with their vehicle to see how it performs with a different engine type. Whatever the reason, it is important to carefully consider the decision and understand the implications of the conversion before moving forward.Dodge Ram: Converting from 8 Cylinder to 4 Cylinder

What are the steps involved in converting a Dodge Ram from 8 cylinders to 4?

Converting a Dodge Ram from an 8-cylinder engine to a 4-cylinder engine is a complex and involved process that should only be undertaken by experienced mechanics or automotive professionals. The first step is to carefully research and select the appropriate 4-cylinder engine that is compatible with your specific Dodge Ram model. Once the new engine is acquired, the next step is to remove the existing 8-cylinder engine from the vehicle. This requires the disconnection of various components, such as the exhaust system, transmission, and electrical wiring.

After the old engine has been removed, the 4-cylinder engine will need to be carefully installed in its place, with all necessary connections and components properly integrated. This may involve modifications to the vehicle’s frame or other structural elements to ensure proper fit and function. Additionally, the vehicle’s onboard computer may need to be reprogrammed to accommodate the new engine, and other adjustments may be required to address any compatibility issues. Finally, thorough testing and inspection must be conducted to ensure that the conversion has been completed successfully and that the vehicle is safe and functional.

What are the potential benefits and drawbacks of converting a Dodge Ram from 8 cylinders to 4?

There are several potential benefits of converting a Dodge Ram from 8 cylinders to 4, with the primary advantage being improved fuel efficiency. A 4-cylinder engine typically consumes less fuel than an 8-cylinder engine, leading to cost savings over time. Additionally, a 4-cylinder engine may weigh less and require less maintenance, potentially reducing overall vehicle operating costs. However, there are also drawbacks to consider, such as potential decreases in vehicle performance and towing capacity. A 4-cylinder engine may not provide the same level of power and acceleration as an 8-cylinder engine, and it may struggle when towing heavy loads. It is important to carefully weigh the potential benefits and drawbacks before deciding to convert.

Conclusion

In conclusion, converting a Dodge Ram from an 8-cylinder engine to a 4-cylinder engine is a significant decision that requires careful consideration and planning. While there are potential benefits in terms of improved fuel efficiency and reduced operating costs, there are also drawbacks in terms of performance and towing capacity. If you are considering this conversion, it is important to thoroughly research and consult with automotive professionals to understand the implications and ensure that the process is carried out safely and effectively.

Dodge Ram: Converting from 8 Cylinder to 4 Cylinder

FAQs

Q: Can I perform the conversion myself?

A: Converting a Dodge Ram from 8 cylinders to 4 is an extremely complex process that should only be undertaken by experienced mechanics or automotive professionals. It requires specialized knowledge and tools, as well as an understanding of the vehicle’s systems and components.

Q: Will a 4-cylinder engine fit my Dodge Ram?

A: It is essential to carefully research and select the appropriate 4-cylinder engine that is compatible with your specific Dodge Ram model. The engine must be the right size and possess the necessary specifications to fit and function properly within your vehicle.

Q: Will converting to a 4-cylinder engine void my vehicle’s warranty?

A: It is important to consult with your vehicle’s manufacturer and review your warranty agreement before proceeding with any engine conversion. Converting to a 4-cylinder engine could potentially impact your warranty coverage, so it is crucial to understand the implications before making any changes.

Q: Will my vehicle’s performance be affected by the conversion?

A: Converting from an 8-cylinder engine to a 4-cylinder engine may result in decreases in vehicle performance, particularly in terms of power and acceleration. It is important to carefully consider how the conversion may impact your driving experience and intended use of the vehicle.

Q: Can I reverse the conversion if I am not satisfied with the results?

A: Reversing the conversion from 8 cylinders to 4 would require a significant amount of time, resources, and expertise. It is not a decision to be made lightly, and it is important to carefully consider the potential long-term implications before moving forward with the conversion.


[ad_2]

Dodge Ram 6.7L Cummins Diesel Filter Set: A Complete Guide

0

[ad_1]

Are you looking for a comprehensive guide on the Dodge Ram 6.7L Cummins Diesel Filter Set? Look no further! In this article, we will cover everything you need to know about this filter set, including its features, installation process, maintenance, and more. Whether you’re a seasoned mechanic or a novice car enthusiast, this guide will help you understand the importance of the filter set and how to properly maintain it for optimal performance.

What is the Dodge Ram 6.7L Cummins Diesel Filter Set?

The Dodge Ram 6.7L Cummins Diesel Filter Set is a vital component of the vehicle’s fuel system. It consists of several filters, including the fuel filter, oil filter, and air filter, all designed to remove impurities and contaminants from the fuel, oil, and air entering the engine. The filter set plays a crucial role in maintaining the engine’s performance, improving fuel efficiency, and prolonging the life of the vehicle.

Proper maintenance of the filter set is essential to ensure the engine runs smoothly and efficiently. Neglecting to replace these filters can lead to clogging, reduced engine performance, and potential damage to the engine over time.

Dodge Ram 6.7L Cummins Diesel Filter Set

How to Install the Dodge Ram 6.7L Cummins Diesel Filter Set?

Installing the Dodge Ram 6.7L Cummins Diesel Filter Set is a relatively straightforward process that can be done at home with the right tools and knowledge. Begin by locating the filter housing, typically located near the engine or fuel tank. Using a wrench or socket set, carefully remove the housing cover to access the old filters. Before removing the old filters, it’s important to drain any excess fuel or oil from the housing to prevent spillage.

Next, carefully remove the old filters, taking note of their orientation and position. Replace each filter with a new, compatible filter from the Dodge Ram 6.7L Cummins Diesel Filter Set, ensuring a proper fit and seal. Once the new filters are installed, replace the housing cover and tighten it securely. Finally, prime the fuel system as per the manufacturer’s instructions to remove any air from the system, and you’re all set!

How to Maintain the Dodge Ram 6.7L Cummins Diesel Filter Set?

Regular maintenance of the Dodge Ram 6.7L Cummins Diesel Filter Set is crucial for optimal engine performance and longevity. It’s recommended to replace the fuel filter every 15,000 to 30,000 miles, the oil filter with every oil change, and the air filter according to the manufacturer’s recommendations. Additionally, inspecting the filters for any signs of damage, clogging, or excessive wear is essential to prevent potential issues down the road.

Aside from filter replacement, keeping the filter housing and surrounding areas clean and free of debris is important in maintaining the integrity of the filters. Inspect the housing for any signs of leaks, cracks, or damage, and address any issues promptly to prevent contamination of the filters and the fuel system.

What are the Benefits of Using the Dodge Ram 6.7L Cummins Diesel Filter Set?

The Dodge Ram 6.7L Cummins Diesel Filter Set offers a multitude of benefits for your vehicle, including improved engine performance, better fuel economy, and prolonged engine life. By effectively removing impurities and contaminants from the fuel, oil, and air entering the engine, the filter set helps maintain a clean and efficient combustion process, resulting in smoother operation and optimized power output.

Additionally, the filter set helps preserve the vital components of the engine by preventing debris from causing damage and wear. With regular maintenance and filter replacement, the Dodge Ram 6.7L Cummins Diesel Filter Set can help you get the most out of your vehicle for years to come.

Conclusion

In conclusion, the Dodge Ram 6.7L Cummins Diesel Filter Set is an essential component of the vehicle’s fuel system, designed to remove impurities and contaminants from the fuel, oil, and air entering the engine. Proper installation and maintenance of the filter set are crucial for optimal engine performance, improved fuel efficiency, and prolonged engine life. By understanding the importance of the filter set and following the recommended maintenance schedule, you can ensure your Dodge Ram 6.7L Cummins Diesel engine continues to run smoothly and efficiently.

Dodge Ram 6.7L Cummins Diesel Filter Set

FAQs

1. How often should I replace the fuel filter in the Dodge Ram 6.7L Cummins Diesel Filter Set?

The fuel filter should be replaced every 15,000 to 30,000 miles, depending on your driving habits and the type of fuel used.

2. Can I install the Dodge Ram 6.7L Cummins Diesel Filter Set myself, or do I need professional help?

While the filter set can be installed at home with the right tools and knowledge, if you’re unsure about the process, it’s best to seek help from a professional mechanic.

3. What are the signs that indicate my filters need replacement?

Symptoms such as reduced engine performance, rough idling, decreased fuel efficiency, and black smoke from the exhaust could indicate the need for filter replacement.

4. Are there any aftermarket filter options for the Dodge Ram 6.7L Cummins Diesel Filter Set?

Yes, there are various aftermarket filter options available, but it’s important to ensure compatibility and quality before making a purchase.

5. Why is maintaining the filter set important for the vehicle’s overall performance?

Maintaining the filter set is crucial for removing impurities and contaminants from the fuel, oil, and air entering the engine, which can significantly impact engine performance, fuel efficiency, and engine life.


[ad_2]

How to Change a Dodge Key Fob Battery

0

[ad_1]

In this article, we will discuss the step-by-step process of changing a Dodge Key Fob Battery. We will cover everything from identifying the type of battery needed to opening the key fob and replacing the old battery with a new one. By the end of this article, you will have the knowledge and confidence to easily replace the battery in your Dodge key fob.

How do I know if my Dodge key fob battery needs to be replaced?

If your Dodge key fob is not responding as it should when you press the buttons, it may be time to replace the battery. You may also notice that the range of the key fob’s signal is decreasing. In some cases, the key fob will not work at all. These are all signs that the battery is running low and needs to be replaced.

To check if the battery needs to be replaced, simply try pressing the buttons on the key fob from different distances and angles. If the response is inconsistent or weak, the battery is likely the issue.

Dodge Key Fob Battery

What type of battery does my Dodge key fob use?

Dodge key fobs typically use a small coin cell battery, also known as a lithium battery. The most common type of battery used in Dodge key fobs is the CR2032. It is important to double-check the type of battery your specific key fob uses before purchasing a replacement.

To determine the type of battery your key fob uses, you can carefully open the key fob and locate the battery inside. The type of battery will be printed on the battery itself. You can also refer to the owner’s manual for your Dodge vehicle to find information about the key fob battery.

How do I open my Dodge key fob to access the battery?

Opening a Dodge key fob to access the battery is a fairly simple process. Most Dodge key fobs have a small indentation or slot on the side that can be used to pry open the fob. You can use a small flathead screwdriver or a coin to carefully open the key fob without causing damage.

Once you have located the indentation or slot, gently insert the screwdriver or coin and twist to separate the two halves of the key fob. Be cautious not to apply too much force, as this could cause the key fob to break. Once the fob is open, you will have access to the battery and can proceed with replacing it.

How do I replace the battery in my Dodge key fob?

With the key fob open, you can easily locate the battery inside. Carefully remove the old battery using a small tool or your fingers. Take note of the orientation of the old battery before removing it, as this will help ensure the new battery is installed correctly.

Once the old battery is removed, insert the new battery in the same orientation. Press down gently to ensure that the battery is secure. Then, carefully reassemble the two halves of the key fob and ensure that they are properly aligned before snapping them back together.

How do I reprogram my Dodge key fob after replacing the battery?

In most cases, replacing the battery in your Dodge key fob should not require reprogramming. However, if you find that the key fob is still not working after replacing the battery, you may need to reprogram it. This process typically involves pressing a series of buttons on the key fob and/or in the vehicle itself to sync the key fob with the car’s system.

It is recommended to consult the owner’s manual for your Dodge vehicle or contact a professional if you are unsure how to reprogram the key fob. The specific steps for reprogramming may vary depending on the model and year of your Dodge vehicle.

Conclusion

Replacing the battery in your Dodge key fob is a simple and cost-effective way to ensure that your key fob continues to work as it should. By identifying the signs of a low battery, determining the type of battery needed, and following the step-by-step process of opening the key fob and replacing the battery, you can keep your Dodge key fob in optimal condition.

Dodge Key Fob Battery

FAQs

1. Can I use any type of battery to replace my Dodge key fob battery?

It is important to use the specific type of battery recommended for your Dodge key fob, such as the CR2032. Using a different type of battery may cause damage to the key fob or result in it not working properly.

2. How long do Dodge key fob batteries typically last?

The lifespan of a Dodge key fob battery can vary depending on usage and environmental factors. On average, a key fob battery can last anywhere from 2 to 4 years before needing to be replaced.

3. Do I need to replace the battery in both of my Dodge key fobs at the same time?

It is not necessary to replace the batteries in both key fobs at the same time. However, if one key fob’s battery is running low, the other will likely need to be replaced soon as well.

4. Can I reprogram my Dodge key fob myself?

In some cases, it is possible to reprogram the key fob yourself by following the instructions in the owner’s manual. However, if you are unsure or have difficulty, it is best to seek assistance from a professional.

5. Where can I purchase a replacement battery for my Dodge key fob?

Replacement batteries for Dodge key fobs can be found at most automotive parts stores, as well as online retailers. It is important to ensure that you are purchasing the correct type of battery for your specific key fob model.


[ad_2]

Dodge Key Fob Battery

How to properly remove a charger from your Tesla electric car

0

[ad_1]

In this article, we will discuss the steps on how to properly remove a charger from your Tesla electric car. As electric vehicles become more popular, many owners are looking for guidance on how to safely and efficiently handle their chargers. We will provide clear and concise instructions on how to disconnect the charger from your Tesla, ensuring that you can do so with confidence and ease.

How do I safely remove the charger from my Tesla?

Removing the charger from your Tesla is a simple process, but it’s important to do so safely and correctly. First, make sure that your Tesla is turned off before attempting to disconnect the charger. Next, locate the charging port on your car, which is typically located on the rear or front driver’s side of the vehicle. Once you have located the charging port, gently press the release button located near the port to unlock the charger.

how to properly remove a charger from your Tesla

After the charger is unlocked, carefully grip the handle of the charger and gently remove it from the port. Make sure to handle the charger with care to avoid any damage or injury. Once the charger is disconnected, securely stow it away in the designated storage compartment or area to keep it safe and protected until the next use.

Are there any additional precautions I should take when removing the charger?

While removing the charger from your Tesla is a relatively straightforward process, there are some additional precautions you can take to ensure that you do so safely. Always ensure that the charging cable is not tangled or wrapped around any obstructions, as this can create unnecessary strain on the cable and port. Additionally, it’s important to inspect the charging port and cable for any signs of wear or damage before plugging in or removing the charger.

If you notice any damage or issues with the charging equipment, it’s best to consult with a professional or contact Tesla support for guidance. By taking these extra precautions, you can help to extend the longevity of your charging equipment and ensure that it remains in good working condition for years to come.

What should I do if the charger does not release from the port?

If you encounter any issues with removing the charger from the port, it’s important to remain calm and assess the situation before taking further action. In some cases, the release mechanism may become stuck or malfunction, preventing the charger from disconnecting from the port.

If this occurs, we recommend gently wiggling the charger handle while pressing the release button to help dislodge any obstructions or issues. If the charger still does not release, it’s best to contact Tesla support or a qualified technician for assistance. Attempting to force the charger to disconnect can result in damage to the port or cable, so it’s important to seek professional guidance if you encounter any difficulties.

Can I leave the charger connected to my Tesla for an extended period?

While it is generally safe to leave the charger connected to your Tesla for an extended period, it’s important to consider the environment and surrounding conditions. If you live in an area that experiences extreme weather conditions, such as excessive heat or cold, it’s best to disconnect the charger when not in use to prevent any potential damage or wear on the equipment.

Additionally, some Tesla owners may choose to leave the charger connected overnight for convenience, but it’s important to monitor the charging process and ensure that the equipment remains in good working condition. If you have any concerns about leaving the charger connected for an extended period, we recommend consulting with Tesla support or a qualified technician for guidance.

how to properly remove a charger from your Tesla

Conclusion

Removing the charger from your Tesla is a simple yet important task that ensures the proper care and maintenance of your electric vehicle. By following the steps outlined in this article and taking the necessary precautions, you can confidently and safely remove the charger from your Tesla without any issues. Remember to always handle the charger with care and attention to detail to ensure that it remains in good working condition for years to come.

FAQs

Can I use any charger with my Tesla?

No, it’s important to use the correct charging equipment that is compatible with your Tesla model to ensure safe and efficient charging. Using incompatible chargers can result in damage to the vehicle or equipment.

Do I need to turn off my Tesla before removing the charger?

Yes, it’s crucial to turn off your Tesla before disconnecting the charger to prevent any potential electrical issues or hazards.

How often should I inspect my charging equipment for wear or damage?

It’s recommended to inspect your charging equipment before each use to ensure that it remains in good working condition. If you notice any damage or issues, it’s best to seek professional guidance for further inspection and potential repairs.

Can I charge my Tesla in the rain?

Tesla electric vehicles are designed to withstand a variety of weather conditions, including rain. However, it’s important to take precautions and ensure that the charging equipment is kept dry and protected from any potential water exposure during the charging process.

What should I do if I encounter any issues with my charging equipment?

If you encounter any issues with your charging equipment, such as difficulty disconnecting the charger or signs of wear or damage, it’s best to seek professional guidance from Tesla support or a qualified technician to address the issue promptly and effectively.


[ad_2]

how to properly remove a charger from your Tesla

Exploring the Features of the Tesla Model 3 Rear Screen

0

[ad_1]

Description

In this article, we will explore the features of the Tesla Model 3 rear screen. The Tesla Model 3 is known for its innovative technology and sleek design, and the rear screen is no exception. From entertainment options to vehicle settings, the rear screen offers a wide range of functionality for both drivers and passengers. Let’s take a closer look at what the Tesla Model 3 rear screen has to offer.

Tesla Model 3 Rear Screen

What entertainment options are available on the rear screen?

The Tesla Model 3 rear screen provides a variety of entertainment options for passengers. From streaming music and videos to playing games, the rear screen is designed to keep passengers entertained during their journey. Passengers can access streaming services such as Spotify and YouTube, allowing them to listen to their favorite music or watch videos while on the go. In addition, the rear screen also features a selection of games that passengers can play, providing an enjoyable and interactive experience for those in the back seats.

The rear screen also allows passengers to control media playback and adjust volume levels, giving them the freedom to customize their entertainment experience to their liking. With its intuitive interface and high-quality display, the rear screen provides passengers with a range of entertainment options to enjoy during their ride.

How can the rear screen be used to control vehicle settings?

In addition to entertainment features, the Tesla Model 3 rear screen also offers functionality for controlling vehicle settings. From adjusting climate controls to accessing vehicle information, the rear screen provides a convenient way for passengers to interact with the car’s systems. Passengers can use the rear screen to adjust the temperature and airflow in the back seats, ensuring their comfort throughout the journey.

The rear screen also displays key vehicle information, such as battery level, range, and charging status, allowing passengers to stay informed about the car’s performance. With its user-friendly interface and seamless integration with the car’s systems, the rear screen makes it easy for passengers to manage vehicle settings and stay connected to their surroundings while on the road.

Can the rear screen be used for navigation and communication?

Yes, the rear screen in the Tesla Model 3 can be used for navigation and communication purposes. Passengers can access the car’s navigation system from the rear screen, allowing them to view the route, search for destinations, and get real-time traffic information. This feature provides passengers with a way to stay informed about their journey and engage with the navigation system, enhancing their overall travel experience.

In addition, the rear screen also includes communication options, such as making phone calls and sending messages. Passengers can use the rear screen to communicate with the driver or other passengers, as well as access their contacts and call history. With its seamless integration with the car’s communication features, the rear screen enables passengers to stay connected and engaged while on the move.

Conclusion

The Tesla Model 3 rear screen offers a wide range of features and functionality for both drivers and passengers. From entertainment options to vehicle settings and communication capabilities, the rear screen is designed to enhance the overall travel experience for everyone in the car. With its intuitive interface, high-quality display, and seamless integration with the car’s systems, the rear screen provides a convenient and enjoyable way for passengers to stay entertained, informed, and connected while on the road.

Tesla Model 3 Rear Screen

FAQs

1. How do I access entertainment options on the rear screen?

To access entertainment options on the Tesla Model 3 rear screen, simply tap the “Entertainment” icon on the screen. From there, you can choose from a variety of streaming services, games, and media controls to customize your entertainment experience.

2. Can I control vehicle settings from the rear screen?

Yes, the Tesla Model 3 rear screen allows you to control vehicle settings such as climate controls and access vehicle information. Simply tap the “Controls” icon on the screen to adjust climate settings or view key vehicle information.

3. Can I use the rear screen for navigation purposes?

Yes, the rear screen can be used for navigation. Simply tap the “Navigation” icon on the screen to access the car’s navigation system, view the route, search for destinations, and get real-time traffic information.

4. How do I communicate with others using the rear screen?

To communicate with others using the Tesla Model 3 rear screen, tap the “Phone” or “Messages” icon on the screen. From there, you can make phone calls, send messages, and access your contacts and call history.

5. Can the rear screen be customized to suit my preferences?

Yes, the rear screen in the Tesla Model 3 can be customized to suit your preferences. You can personalize your entertainment experience, adjust vehicle settings, and customize communication options to enhance your overall travel experience.


[ad_2]

Tesla Model 3 Rear Screen

Everything You Need to Know About Tesla Model 3 Fog Lights

0

[ad_1]

In this article, we will discuss all the important details about Tesla Model 3 fog lights. From the basics of fog lights to how they function in the Tesla Model 3, we will cover it all. Whether you are a new Tesla owner or a potential buyer, understanding the fog lights in your Tesla Model 3 can greatly enhance your driving experience.

What are fog lights and why are they important?

Fog lights are a type of automotive lights that are specifically designed to improve visibility in foggy, misty, or rainy conditions. Traditional headlights are not effective in such weather conditions, as they tend to produce glare and reflect off the moisture in the air, further reducing visibility. Fog lights emit a wide, low beam that cuts through the fog and illuminates the road ahead, making it easier for the driver to see and be seen by other vehicles.

Tesla Model 3 Fog Lights

In the Tesla Model 3, fog lights play a crucial role in ensuring safe driving in adverse weather conditions. Whether you encounter fog, heavy rain, or mist, having properly functioning fog lights can make a significant difference in your ability to navigate through such conditions.

How do the fog lights work in the Tesla Model 3?

The Tesla Model 3 comes equipped with LED fog lights that are integrated into the front bumper of the car. These fog lights are activated using the car’s touchscreen display, where you can control various lighting functions. When the fog lights are turned on, they emit a bright, low beam of light that is directed toward the road surface, improving visibility in foggy or misty conditions.

The Tesla Model 3 fog lights are designed to be energy-efficient and long-lasting, making them a reliable addition to the car’s overall lighting system. Whether you are driving through inclement weather or simply need added visibility in low-light conditions, the fog lights in the Tesla Model 3 provide an extra layer of safety and convenience.

Are fog lights standard in the Tesla Model 3?

Yes, fog lights are standard in the Tesla Model 3. The car comes equipped with LED fog lights as part of its standard lighting package. Whether you purchase the base model or opt for additional features, the fog lights are included as a standard safety feature. However, it’s important to note that the use of fog lights should be limited to when they are truly needed, as excessive use can be distracting to other drivers and may not be legal in some areas.

How do I maintain and care for the fog lights in my Tesla Model 3?

Maintaining the fog lights in your Tesla Model 3 is relatively simple. Regularly check the condition of the lights to ensure they are free from dirt, debris, or any signs of damage. Clean the fog lights as part of your regular car maintenance routine, using a soft cloth and non-abrasive cleaner to gently wipe away any buildup or residue. In the event of damage or malfunction, consult with a Tesla service center for professional assistance and potential replacement.

Can I upgrade the fog lights in my Tesla Model 3?

While the standard LED fog lights in the Tesla Model 3 are sufficient for most driving conditions, some owners may wish to upgrade to higher-performance or customizable fog lights. Tesla offers official accessories and upgrades for their vehicles, including lighting options that can enhance visibility and aesthetics. Before making any upgrades to your fog lights, it’s important to consult with Tesla or a certified automotive technician to ensure compatibility and proper installation.

Conclusion

Understanding the role and functionality of fog lights in the Tesla Model 3 is essential for maximizing safety and performance in adverse weather conditions. By learning how fog lights work, how to maintain them, and potential upgrades, Tesla Model 3 owners can ensure that their driving experience is consistently safe and enjoyable.

Tesla Model 3 Fog Lights

FAQs

Are fog lights legal in all areas?

It’s important to check the local laws and regulations regarding the use of fog lights in your area. In some regions, the use of fog lights without appropriate weather conditions may be illegal and subject to fines.

Can I install aftermarket fog lights on my Tesla Model 3?

While aftermarket fog lights are available, it’s recommended to consult with a certified technician or authorized Tesla service center before making any modifications to your vehicle’s lighting system.

Do fog lights drain the battery in the Tesla Model 3?

The LED fog lights in the Tesla Model 3 are designed to be energy-efficient, minimizing any significant drain on the car’s battery. However, it’s still advisable to use fog lights judiciously to preserve battery life.

Can I use fog lights in heavy rain or snow?

Fog lights can be beneficial in heavy rain or snow, as they help improve visibility in low-light and adverse weather conditions. However, make sure to only use them when necessary and consider adjusting your driving speed and behavior accordingly.

What should I do if my fog lights are not functioning properly?

If you encounter any issues with your fog lights, such as flickering, dimming, or complete malfunction, contact a Tesla service center for professional inspection and potential repairs or replacements.


[ad_2]

Tesla Model 3 Fog Lights

Understanding the Dodge Dakota 3.9 V6 engine diagram

0

[ad_1]

In this article, we will discuss the ins and outs of the Dodge Dakota 3.9 V6 engine diagram. We will break down the components of the engine, explain how they work together, and provide a comprehensive understanding of this powerful machine. Whether you’re a car enthusiast or a beginner, this article will provide valuable insights into the mechanics of the Dodge Dakota 3.9 V6 engine.

What are the key components of the Dodge Dakota 3.9 V6 engine?

The Dodge Dakota 3.9 V6 engine is comprised of several key components that work together to power the vehicle. The engine block, piston, crankshaft, camshaft, valves, and spark plugs are some of the essential parts that make up the engine. The engine block houses the cylinders, while the pistons move up and down within the cylinders to generate power. The crankshaft converts the linear motion of the pistons into rotational motion, which is then transferred to the wheels through the transmission.

The camshaft controls the opening and closing of the valves, which allow air and fuel to enter the combustion chamber and exhaust gases to exit. The spark plugs ignite the air and fuel mixture, creating controlled explosions that drive the pistons up and down. These components work in harmony to produce the power needed to propel the vehicle forward.

Dodge Dakota 3.9 V6 Engine Diagram

How does the Dodge Dakota 3.9 V6 engine function?

The Dodge Dakota 3.9 V6 engine operates on a four-stroke combustion cycle, which consists of intake, compression, power, and exhaust strokes. During the intake stroke, the intake valve opens and allows air and fuel to enter the combustion chamber. The piston then moves upward to compress the air and fuel mixture during the compression stroke. When the piston reaches the top of its stroke, the spark plug ignites the mixture, creating a powerful explosion that drives the piston downward during the power stroke.

Finally, the exhaust valve opens during the exhaust stroke, allowing the burnt gases to exit the combustion chamber. This continuous cycle of intake, compression, power, and exhaust strokes allows the engine to produce the energy needed to move the vehicle. The timing and coordination of these processes are crucial for the engine to operate efficiently.

What are the benefits of the Dodge Dakota 3.9 V6 engine diagram?

Understanding the Dodge Dakota 3.9 V6 engine diagram provides several benefits for car owners and enthusiasts. First and foremost, it allows individuals to grasp the inner workings of their vehicle and build a deeper appreciation for its engineering. Additionally, having a clear understanding of the engine diagram can help in identifying and diagnosing potential issues. By knowing how each component functions, car owners can better communicate with mechanics and make informed decisions about maintenance and repairs.

Furthermore, enthusiasts can use the engine diagram to customize and modify their vehicle, whether it’s for enhanced performance or aesthetic purposes. Overall, a comprehensive understanding of the Dodge Dakota 3.9 V6 engine diagram empowers car owners to make informed decisions about their vehicles and enhances their overall driving experience.

How can I maintain the Dodge Dakota 3.9 V6 engine?

Maintaining the Dodge Dakota 3.9 V6 engine is essential for optimal performance and longevity. Regular oil changes, air filter replacements, and spark plug inspections are crucial for keeping the engine running smoothly. Additionally, staying on top of scheduled maintenance tasks, such as timing belt replacements and coolant flushes, can prevent costly repairs down the line.

It’s also important to pay attention to any unusual sounds, smells, or vibrations coming from the engine, as these could indicate potential issues. By addressing problems early on, car owners can prevent further damage and maintain the health of their engines. Finally, following the manufacturer’s recommended maintenance schedule and using high-quality fluids and parts are key to preserving the performance of the Dodge Dakota 3.9 V6 engine.

Conclusion

In conclusion, understanding the Dodge Dakota 3.9 V6 engine diagram provides valuable insights into the mechanics of this powerful machine. By breaking down the key components and functions of the engine, car owners and enthusiasts can gain a deeper appreciation for their vehicle and make informed decisions about maintenance and repairs. With regular maintenance and a comprehensive understanding of the engine diagram, the Dodge Dakota 3.9 V6 engine can perform at its best for years to come.

Dodge Dakota 3.9 V6 Engine Diagram

FAQs

Q: Can I use aftermarket parts to modify the Dodge Dakota 3.9 V6 engine?

A: Yes, aftermarket parts can be used to modify the Dodge Dakota 3.9 V6 engine, but it’s important to choose reputable brands and consult with a professional to ensure compatibility and performance.

Q: What should I do if the check engine light comes on?

A: If the check engine light comes on, it’s important to have the vehicle diagnosed by a professional to identify the underlying issue. Ignoring the warning light could lead to further damage and costly repairs.

Q: How often should I have the engine oil changed?

A: It’s recommended to have the engine oil changed every 5,000 to 7,500 miles, or as specified in the vehicle’s owner’s manual. Regular oil changes are essential for maintaining the health of the engine.

Q: Can I perform maintenance tasks on the engine myself?

A: While some maintenance tasks, such as checking and refilling fluids, can be performed by car owners, more complex procedures should be left to trained professionals. It’s important to have the necessary knowledge and tools to avoid causing damage to the engine.

Q: What is the expected lifespan of the Dodge Dakota 3.9 V6 engine?

A: With proper maintenance and care, the Dodge Dakota 3.9 V6 engine can last for over 200,000 miles. Following the manufacturer’s recommended maintenance schedule and addressing any issues promptly can help extend the lifespan of the engine.


[ad_2]

Dodge Dakota 3.9 V6 Engine Diagram

Understanding Tesla Model 3 Pillar Delete

0

[ad_1]

In this article, we will discuss the concept of pillar deletion in the context of the Tesla Model 3 Pillar Delete. We will explore what it means, its benefits, and how it can impact the overall design and performance of the vehicle. We will also address common questions and concerns related to this feature.

What is Pillar Delete?

Pillar delete, also known as pillarless design, refers to the absence of vertical support structures (pillars) between the windows of a car. In the case of the Tesla Model 3, pillar deletion typically involves the removal of the B-pillars, which are located between the front and rear doors on either side of the vehicle.

By eliminating the B-pillars, Tesla can create a seamless, open space when the doors are opened, allowing for easier ingress and egress for passengers. This design also contributes to a more streamlined and visually appealing exterior appearance.

Tesla Model 3 Pillar Delete

Benefits of Pillar Delete

One of the primary benefits of pillar delete in the Tesla Model 3 is the improved access to the interior of the vehicle. With the absence of B-pillars, passengers can enter and exit the car more effortlessly, particularly in tight parking spaces or crowded urban environments.

Additionally, pillar deletion can enhance the overall aesthetic of the vehicle, giving it a more modern and sleek look. The uninterrupted side profile created by the absence of B-pillars contributes to a sense of openness and spaciousness within the cabin.

How Does Pillar Delete Impact the Vehicle?

From a structural perspective, the absence of B-pillars in the Tesla Model 3 requires alternative engineering solutions to maintain the structural integrity and safety of the vehicle. Advanced materials and construction techniques are employed to ensure that the car meets stringent safety standards despite the removal of the traditional support structures.

In terms of performance, the streamlined design resulting from pillar deletion can contribute to improved aerodynamics, which in turn can enhance the vehicle’s efficiency and range. By reducing drag and optimizing airflow around the car, Tesla can maximize the Model 3’s energy efficiency.

What to Consider Before Opting for Pillar Delete

While the benefits of pillar deletion in the Tesla Model 3 are evident, it’s important to consider the potential trade-offs. The removal of B-pillars may impact the rigidity and crashworthiness of the vehicle, as those support structures play a critical role in protecting occupants in the event of a collision.

Furthermore, the structural modifications required for pillar deletion may have cost implications, potentially affecting the overall price of the vehicle. Prospective buyers should weigh the advantages and drawbacks of this feature before making a decision.

Conclusion

In conclusion, pillar deletion in the Tesla Model 3 represents a bold design choice that introduces both practical and aesthetic advantages. By removing B-pillars, Tesla enhances the accessibility and visual appeal of the vehicle, while also addressing potential engineering and safety challenges. As electric vehicle technology continues to evolve, innovative features like pillar delete demonstrate Tesla’s commitment to pushing the boundaries of automotive design and performance.

Tesla Model 3 Pillar Delete

FAQs

1. Can I retrofit the pillar delete to my existing Model 3?

No, pillar delete is an integral design element that cannot be retrofitted to an existing Model 3. It is part of the original construction and engineering of the vehicle.

2. Does pillar delete affect the structural integrity of the Model 3?

Tesla employs advanced engineering techniques to ensure that pillar deletion does not compromise the structural integrity and safety of the Model 3. The vehicle undergoes rigorous testing to meet safety standards.

3. Is pillar delete available in all Tesla Model 3 models?

No, pillar delete is typically offered as an optional feature in certain trim levels or special editions of the Model 3. It may not be available in all configurations.

4. Does pillar delete impact the warranty of the Model 3?

Tesla’s warranty coverage for the Model 3 takes into account any unique features or modifications, including pillar deletion. It is recommended to consult with a Tesla representative for specific warranty information.

5. How does pillar delete affect the vehicle’s aerodynamics?

The absence of B-pillars in the Model 3 contributes to a more streamlined external profile, reducing drag and improving aerodynamics. This can result in enhanced energy efficiency and range for the vehicle.

[ad_2]

Tesla Model 3 Pillar Delete

Troubleshooting: Dodge Charger Push Button to Start Not Working

0

[ad_1]

In this article, we will discuss the common issues that may cause the Dodge Charger Push Button to Start Not Working. We will cover troubleshooting steps and solutions for resolving the issue.

Why is my Dodge Charger push button not working?

If your Dodge Charger’s push-button start is not working, there could be several potential reasons for this issue. One common cause is a weak or dead battery in the key fob. The key fob transmits a signal to the car’s ignition system, and if the battery is low, it may not be able to send the signal effectively. Another possible reason is a faulty ignition switch, which can prevent the car from recognizing the key fob and starting the engine. Additionally, issues with the car’s immobilizer system or a malfunctioning push button start module could also be to blame.

To troubleshoot this issue, start by checking the battery in the key fob. If it is low, replace it with a new one and see if the problem is resolved. If the issue persists, it may be necessary to have the ignition switch, immobilizer system, or push-button start module inspected and repaired by a qualified technician.

Dodge Charger Push Button to Start Not Working

How can I troubleshoot the push button start on my Dodge Charger?

If you are experiencing difficulties with the push button start on your Dodge Charger, there are several steps you can take to troubleshoot the issue. First, check the battery in the key fob to ensure it does not cause a problem. If the battery is low, replace it with a new one and test the push button start again. You can also try using the spare key fob, as the issue may be with the key fob itself rather than the car’s ignition system. Additionally, checking the car’s immobilizer system and inspecting the ignition switch for any signs of damage or malfunction may help identify the cause of the problem. If none of these steps resolve the issue, it is recommended to seek professional assistance from an authorized Dodge service center.

What are the common solutions for a non-working push button start on a Dodge Charger?

If the push button starts on your Dodge Charger is not working, several common solutions may help resolve the issue. As mentioned earlier, checking the battery in the key fob and replacing it if necessary is a simple and often effective solution. Additionally, testing the spare key fob and inspecting the car’s immobilizer system can help identify the cause of the problem. If these steps do not resolve the issue, it may be necessary to have the ignition switch and push button start module inspected and repaired by a professional technician. It is important to address any issues with the push button start promptly to ensure the continued function of your vehicle’s ignition system.

Conclusion

In conclusion, a non-working push button start on a Dodge Charger can be caused by various factors such as a weak key fob battery, a faulty ignition switch, or issues with the car’s immobilizer system. By following the troubleshooting steps outlined in this article and seeking professional assistance when necessary, you can effectively address the issue and restore the function of your car’s push button start.

Dodge Charger Push Button to Start Not Working

FAQs

1. My Dodge Charger push button start is not working. What should I do?

If your Dodge Charger’s push-button start is not working, start by checking the battery in the key fob. If the battery is low, replace it with a new one and test the push button start again. If the issue persists, it may be necessary to have the ignition switch, immobilizer system, or push-button start module inspected and repaired by a qualified technician.

2. Can using the spare key fob fix the push button start issue?

Yes, using the spare key fob can help determine if the issue is with the key fob itself rather than the car’s ignition system. If the spare key fob works, then the problem may be related to the original key fob. If the issue persists with the spare key fob, further inspection of the ignition system may be needed.

3. Why is it important to address push button start issues promptly?

It is important to address any issues with the push button start promptly to ensure the continued function of your vehicle’s ignition system. Ignoring the issue could lead to more serious problems and potentially leave you stranded with a car that won’t start.

4. What if I cannot resolve the push button start issue on my own?

If you are unable to resolve the push button start issue on your own, it is recommended to seek professional assistance from an authorized Dodge service center. A qualified technician will be able to diagnose the problem and provide the necessary repairs to restore the function of your car’s push button start.

5. Are there any DIY solutions for a non-working push button start on a Dodge Charger?

While checking the key fob battery and using the spare key fob are simple DIY solutions that may resolve the issue, more complex problems with the ignition switch, immobilizer system, or push button start module may require professional inspection and repair. It is important to exercise caution and seek professional assistance when necessary to ensure the proper functioning of your car’s push button start.


[ad_2]

Dodge Charger Push Button to Start Not Working

Tesla Model 3: The Blacked Out Edition

0

[ad_1]

The Tesla Model 3 has gained significant attention with its latest edition, The Blacked Out Edition. In this article, we will discuss the key features of this model, its design, performance, and technology. We will also take a closer look at the aesthetic and functional changes that have been made, making it one of the most desirable electric cars available on the market.

What are the key features of the Blacked Out Edition?

The Tesla Model 3 Blacked Out Edition comes with a sleek, all-black exterior that gives it a striking and modern look. The chrome trim and accessories have been replaced with black accents, including the door handles, side mirror caps, and badges. The 18-inch Aero Wheels have also been finished in black, giving the car a unique and sporty appearance.

On the interior, the Blacked Out Edition features a minimalist and luxurious design with premium materials and finishes. The all-black upholstery and trims create a sophisticated and elegant ambiance, while the advanced technology and comfort features ensure an enjoyable and seamless driving experience.Tesla Model 3: The Blacked Out Edition

How does the Blacked Out Edition perform?

Performance-wise, the Tesla Model 3 Blacked Out Edition offers the same impressive capabilities as the standard model. It is equipped with dual motor all-wheel drive and a Long Range battery that delivers exceptional acceleration, handling, and efficiency. The Blacked Out Edition can go from 0 to 60 mph in just 4.2 seconds and has a top speed of 145 mph, making it a powerful and exhilarating driving experience.

The Blacked Out Edition also comes with Tesla’s Autopilot feature, which provides advanced safety and convenience capabilities. With features such as Traffic-Aware Cruise Control and Autosteer, the Blacked Out Edition offers a semi-autonomous driving experience, enhancing safety and reducing driver fatigue during long journeys.

What are the design and technology updates in the Blacked Out Edition?

In terms of design, the Blacked Out Edition of the Tesla Model 3 has been meticulously crafted to offer a sleek and contemporary aesthetic. The removal of chrome elements and the introduction of black accents create a more aggressive and sophisticated appearance that sets it apart from the standard model.

From a technology perspective, the Blacked Out Edition features the latest advancements in electric vehicle technology, including a responsive and intuitive 15-inch touchscreen display, advanced driver assistance features, and over-the-air software updates. These innovations enhance the overall driving experience and set a new standard for electric vehicles.

What are the aesthetic and functional changes in the Blacked Out Edition?

In addition to the blacked-out exterior and interior, the Blacked Out Edition of the Tesla Model 3 comes with functional upgrades that further enhance its appeal. The standard glass roof has been replaced with a panoramic glass roof, offering an expansive and immersive driving experience. Furthermore, the addition of a premium audio system provides an outstanding sound quality for an immersive entertainment experience.

From a practical standpoint, the Blacked Out Edition also offers ample storage space, including a spacious trunk and a front storage compartment, providing convenience and versatility for everyday use. The inclusion of convenient features such as wireless charging and USB-C ports further enhance the functionality and usability of the vehicle.

Is the Blacked Out Edition worth it?

The Tesla Model 3 Blacked Out Edition offers a compelling combination of performance, design, and technology that makes it a highly attractive option for electric car enthusiasts. With its striking aesthetics, powerful performance, and advanced features, the Blacked Out Edition sets a new standard for electric vehicles. Whether you are looking for a stylish and high-performance electric car, the Blacked Out Edition of the Tesla Model 3 delivers on all fronts.

Frequently Asked Questions

1. Can I customize the Blacked Out Edition?

While the Blacked Out Edition has a sleek all-black exterior and interior as standard, Tesla offers customization options to personalize your vehicle. From custom wheels and interior color choices to additional accessories, you can tailor the Blacked Out Edition to suit your preferences and create a unique driving experience.

2. How does the Blacked Out Edition compare to the standard Model 3?

The Blacked Out Edition of the Tesla Model 3 offers aesthetic and functional upgrades compared to the standard model. With its blacked-out exterior and interior, panoramic glass roof, and premium audio system, the Blacked Out Edition stands out as a more luxurious and stylish variant of the Model 3, while maintaining the exceptional performance and technology features of the standard model.

3. Is the Blacked Out Edition more expensive?

The Blacked Out Edition is priced slightly higher than the standard Model 3, reflecting its design and functional upgrades. However, the additional cost is justified by the enhanced aesthetics, features, and customization options that the Blacked Out Edition offers, making it a worthwhile investment for those seeking a premium electric car experience.

4. What are the color options for the Blacked Out Edition?

As the name suggests, the Blacked Out Edition has an all-black exterior and interior as standard. While the color options are limited for the Blacked Out Edition, the sleek and modern all-black design offers a unique and sophisticated appearance that is sure to turn heads on the road.

5. Does the Blacked Out Edition come with any additional incentives or benefits?

As with other Tesla vehicles, the Blacked Out Edition may be eligible for government incentives and rebates for electric vehicles, depending on your location. Additionally, Tesla offers a range of benefits for its customers, including access to the Supercharger network, over-the-air software updates, and a comprehensive warranty package, adding value and peace of mind to your ownership experience.

Tesla Model 3: The Blacked Out Edition

Conclusion

The Tesla Model 3 Blacked Out Edition stands out as a remarkable and stylish variant of the popular electric car, offering a winning combination of performance, design, and technology. With its sleek all-black exterior and interior, premium features, and advanced capabilities, the Blacked Out Edition sets a new standard for electric vehicles and delivers an exceptional driving experience that is sure to impress enthusiasts and casual drivers alike.


[ad_2]

Tesla Model 3: The Blacked Out Edition

Upgrading Your Dodge Charger with a Push Bar

0

[ad_1]

If you’re looking for a way to enhance the look and functionality of your Dodge Charger, adding a push bar may be the perfect solution. In this article, we’ll discuss the benefits of Upgrading Your Dodge Charger with a Push Bar, as well as the installation process and things to consider before making a purchase.

What is a push bar and how can it benefit my Dodge Charger?

A push bar, also known as a grille guard or push bumper, is a metal bar that is mounted to the front of a vehicle. It is designed to protect the vehicle’s front end from damage in the event of a collision, as well as provide a mounting point for auxiliary lighting or other accessories. By adding a push bar to your Dodge Charger, you can improve its overall appearance while also adding an extra layer of protection.

Additionally, a push bar can be useful for off-road driving, providing a sturdy platform for mounting a winch or recovery gear. It can also serve as a mounting point for a snow plow, making it a practical addition for those living in colder climates. In summary, a push bar can benefit your Dodge Charger by enhancing its appearance, adding protection, and providing functionality for various activities.

Upgrading Your Dodge Charger with a Push Bar

What should I consider before purchasing a push bar for my Dodge Charger?

Before purchasing a push bar for your Dodge Charger, there are a few things to consider. First, you’ll want to make sure that the push bar is compatible with your specific vehicle model and year. Additionally, consider the material and finish of the push bar, as this can affect both its durability and appearance.

It’s also important to think about how the push bar will affect your vehicle’s front-end sensors, if applicable. Some push bars are designed to work with adaptive cruise control and other safety features, while others may require modifications to accommodate these systems. Finally, consider the installation process and whether you’ll be able to install the push bar yourself or if you’ll need to seek professional assistance.

How do I install a push bar on my Dodge Charger?

The installation process for a push bar can vary depending on the specific product and your vehicle’s year and model. However, in general, the installation involves mounting the push bar to the frame of the vehicle using brackets and hardware provided with the push bar kit. It’s important to follow the manufacturer’s instructions closely and ensure that the push bar is securely and properly attached.

If you’re not comfortable with the installation process or if you’re unsure about any aspect of the installation, it’s best to seek professional assistance. A certified mechanic or automotive technician can ensure that the push bar is installed correctly and safely, giving you peace of mind knowing that your Dodge Charger is properly equipped.

What are the best push bar options for the Dodge Charger?

Several reputable brands offer push bars specifically designed for the Dodge Charger. Some popular options include Go Rhino, Westin, and Aries. These brands offer a variety of push bar styles and finishes to suit different preferences and needs.

When choosing a push bar for your Dodge Charger, consider factors such as material, finish, and compatibility with your vehicle’s features. Additionally, read customer reviews and seek recommendations from other Dodge Charger owners to help inform your decision. Ultimately, the best push bar for your Dodge Charger is one that meets your specific requirements and enhances the overall look and performance of your vehicle.

Conclusion

Upgrading your Dodge Charger with a push bar can provide added protection, functionality, and an enhanced appearance. When considering a push bar for your vehicle, it’s important to research different options, consider compatibility and installation, and choose a high-quality product that meets your needs. Whether you’re looking for off-road capability, added protection, or simply a visual enhancement, a push bar can be a valuable addition to your Dodge Charger.

Upgrading Your Dodge Charger with a Push Bar

FAQs

Can a push bar affect my vehicle’s front-end sensors?

Some push bars are designed to work with front-end sensors and safety features, while others may require modifications. It’s important to consider how a push bar may impact your vehicle’s sensors and make sure that the push bar you choose is compatible with these systems.

Can I install a push bar on my own?

The installation process for a push bar can vary, but it generally involves mounting the push bar to the frame of the vehicle. If you’re comfortable with basic automotive DIY and have the necessary tools, you may be able to install the push bar yourself. However, if you’re unsure or uncomfortable with the process, it’s best to seek professional assistance.

What are the benefits of adding a push bar to my Dodge Charger?

Adding a push bar to your Dodge Charger can provide added protection in the event of a collision, as well as functionality for off-road driving or other activities. Additionally, a push bar can enhance the overall appearance of your vehicle, giving it a more rugged and aggressive look.

What brands offer push bars for the Dodge Charger?

Several reputable brands offer push bars specifically designed for the Dodge Charger, including Go Rhino, Westin, and Aries. These brands offer a variety of styles and finishes to suit different preferences and needs.

Will adding a push bar affect my Dodge Charger’s warranty?

Adding a push bar to your Dodge Charger should not affect the vehicle’s warranty, as long as the push bar is installed properly and does not cause damage to the vehicle. It’s always a good idea to consult with a dealership or manufacturer to ensure that any aftermarket modifications will not impact your warranty coverage.


[ad_2]

Upgrading Your Dodge Charger with a Push Bar

Customizing a 2001 Dodge Ram 1500: A DIY Guide

0

[ad_1]

Welcome to our DIY guide on customizing a 2001 Dodge Ram 1500, In this article, we will discuss various ways you can personalize and upgrade your Dodge Ram 1500 to make it your own. From exterior modifications to interior enhancements, we will cover everything you need to know to transform your truck into a unique masterpiece. Whether you’re a seasoned car enthusiast or just getting started with DIY projects, this guide is for you. So, let’s dive into the world of customizing your Dodge Ram 1500.

2001 Dodge Ram 1500

What are some popular exterior modifications for the 2001 Dodge Ram 1500?

When it comes to customizing the exterior of your 2001 Dodge Ram 1500, the options are endless. One of the most popular modifications is upgrading the wheels and tires. New wheels can completely change the look of your truck and give it a more aggressive or stylish appearance. Additionally, installing a lift kit can give your Dodge Ram 1500 a more commanding presence on the road. Whether you opt for a smaller leveling kit or a larger suspension lift, you can tailor the ride height to your preference.

Another common modification is adding aftermarket lighting, such as LED light bars or upgraded headlights and taillights. Not only do these upgrades improve visibility at night, but they also add a touch of personalization to your truck. Lastly, consider adding a custom grille or bumper to further enhance the front end of your Dodge Ram 1500. With various options available, you can choose a style that matches your desired aesthetic.

How can I customize the interior of my 2001 Dodge Ram 1500?

When it comes to interior customization, there are several ways to enhance the look and feel of your 2001 Dodge Ram 1500. Investing in new seat covers or upholstery can instantly freshen up the interior and provide added comfort. Additionally, consider installing aftermarket flooring, such as carpets or all-weather mats, to protect the original surfaces and give your truck a personalized touch.

Upgrading the audio system is another popular modification for the interior of a Dodge Ram 1500. Whether you’re a music aficionado or simply want to enjoy better sound quality, installing new speakers, a subwoofer, and an upgraded head unit can transform your driving experience. Finally, consider adding custom interior trim pieces or accents to personalize the cabin of your truck further.

What performance upgrades can I make to my Dodge Ram 1500?

If you’re looking to enhance the performance of your 2001 Dodge Ram 1500, there are several modifications you can consider. One popular upgrade is installing a cold air intake, which allows for improved airflow and can result in a modest increase in horsepower. Pairing a cold air intake with a cat-back exhaust system can enhance the engine’s performance and give your truck a deeper, more aggressive exhaust note.

For those seeking more substantial power gains, consider investing in a performance tuner or programmer. These devices allow you to optimize the engine’s tuning for increased horsepower and torque, while also offering additional features such as speedometer calibration and data logging. If you’re a truck enthusiast who enjoys off-roading, upgrading the suspension and adding larger, more capable off-road tires can significantly improve your truck’s performance and capabilities.

Can I customize the exterior color of my Dodge Ram 1500?

Yes, you can customize the exterior color of your 2001 Dodge Ram 1500 through various methods. One option is a professional vinyl wrap, which allows you to completely change the color of your truck without the commitment of a permanent paint job. Vinyl wraps provide endless color options, as well as various finishes such as matte, satin, or gloss.

Alternatively, you can opt for a traditional paint job in the color of your choice. Whether you choose a factory color or a custom hue, a new paint job can completely transform the look of your truck. Keep in mind that a professional paint job can be more labor-intensive and costly compared to a vinyl wrap, but it offers a long-lasting finish and endless customization possibilities.

2001 Dodge Ram 1500

Conclusion

Customizing your 2001 Dodge Ram 1500 is an exciting way to make your truck stand out and reflect your style. From exterior upgrades to interior enhancements, there are endless possibilities to make your truck truly your own. Whether you’re looking to improve performance, enhance aesthetics, or increase comfort, the customization options for the Dodge Ram 1500 are virtually limitless. By following this DIY guide and utilizing the best possible resources, you can transform your truck into a one-of-a-kind masterpiece that turns heads wherever you go.

FAQs

Can I install a lift kit on my 2001 Dodge Ram 1500?

Yes, you can install a lift kit on your Dodge Ram 1500 to elevate its ride height and improve off-road capabilities. There are various lift kit options available, ranging from leveling kits to suspension lifts, allowing you to customize the look and performance of your truck.

Is it difficult to install aftermarket lighting on my Dodge Ram 1500?

Installing aftermarket lighting on your 2001 Dodge Ram 1500 can vary in difficulty depending on the type of lights and your level of DIY expertise. It’s important to follow installation instructions carefully and consider professional assistance if needed to ensure proper functionality and safety.

Can I change the interior trim pieces on my Dodge Ram 1500?

Yes, you can change the interior trim pieces on your 2001 Dodge Ram 1500 to personalize the cabin. Many aftermarket options are available, allowing you to add custom accents and improve the overall aesthetics of the interior. Be sure to select trim pieces that are compatible with your specific truck model.

Is a vinyl wrap a good alternative to repainting my truck?

Yes, a vinyl wrap can be a great alternative to repainting your 2001 Dodge Ram 1500. Vinyl wraps offer versatility in color and finish options while protecting the original paint. Additionally, they can be removed without damaging the underlying paint, making it a reversible customization option.

What are the benefits of installing a cold air intake on my Dodge Ram 1500?

Installing a cold air intake on your 2001 Dodge Ram 1500 can improve airflow to the engine, resulting in potential gains in horsepower and torque. Additionally, a cold air intake can provide a more aggressive engine sound and improve fuel efficiency, making it a popular performance upgrade for truck enthusiasts.


[ad_2]

2001 Dodge Ram 1500

Maximize Towing with the Ford F-250

0

[ad_1]

Description

In this article, we will discuss the various ways to maximize towing with the Ford F-250. From understanding towing capacity to proper maintenance and accessories, we will cover everything you need to know to get the most out of your Ford F-250 for your towing needs.

Understanding Towing Capacity

Do you know the towing capacity of your Ford F-250? It is crucial to understand this before towing anything to avoid any potential damage. The towing capacity can be found in the owner’s manual or on the manufacturer’s website. It is the maximum weight that your vehicle can safely tow, including the weight of the trailer and its contents.

If you exceed the towing capacity, it can put unnecessary strain on your vehicle’s engine, transmission, and brakes, leading to potential mechanical issues. To maximize towing with your Ford F-250, always stay within the specified towing capacity for safe and efficient towing.

Maximizing Towing with the Ford F-250

Proper Maintenance for Towing

What maintenance should you perform on your Ford F-250 to ensure optimal towing performance? Regular maintenance is key to maximizing your vehicle’s towing capabilities. This includes keeping up with oil changes, checking and replacing the transmission fluid, and inspecting the brakes and tires for wear and tear.

Additionally, consider upgrading to a heavy-duty towing package if your Ford F-250 did not come with one. This can include a larger radiator, upgraded suspension, and heavy-duty transmission cooler to help handle the extra load of towing. By keeping up with proper maintenance and investing in the right upgrades, you can ensure that your Ford F-250 is ready to handle any towing task.

Choosing the Right Accessories

What accessories can help maximize towing with the Ford F-250? Investing in the right accessories can enhance your vehicle’s towing capabilities. This can include a weight distribution hitch to help distribute the weight more evenly across the trailer and vehicle, reducing strain on the suspension and improving stability.

Consider also adding trailer brakes to your trailer, which can help reduce the workload on your vehicle’s brakes when towing heavy loads. Additionally, a towing mirror extension can provide better visibility when towing wider trailers. By choosing the right accessories, you can make towing with your Ford F-250 safer and more efficient.

Conclusion

In conclusion, maximizing towing with the Ford F-250 involves understanding towing capacity, proper maintenance, and choosing the right accessories. By staying within the towing capacity, keeping up with maintenance, and investing in the right upgrades and accessories, you can ensure that your Ford F-250 is ready to handle any towing task with ease.

Maximizing Towing with the Ford F-250

FAQs

1. Can I tow a trailer that exceeds the towing capacity of my Ford F-250?

No, it is not safe to tow a trailer that exceeds the towing capacity of your Ford F-250. Doing so can put unnecessary strain on your vehicle’s engine, transmission, and brakes, leading to potential mechanical issues. Always stay within the specified towing capacity for safe and efficient towing.

2. What maintenance should I perform on my Ford F-250 for towing?

Regular maintenance is key to maximizing your Ford F-250’s towing capabilities. This includes keeping up with oil changes, checking and replacing the transmission fluid, and inspecting the brakes and tires for wear and tear. Additionally, consider upgrading to a heavy-duty towing package if your vehicle did not come with one.

3. What accessories can help enhance my Ford F-250’s towing capabilities?

Investing in the right accessories can enhance your Ford F-250’s towing capabilities. This can include a weight distribution hitch, trailer brakes, and towing mirror extensions. These accessories can improve stability, reduce brake workload, and provide better visibility when towing.

4. How can I check the towing capacity of my Ford F-250?

The towing capacity can be found in the owner’s manual or on the manufacturer’s website. It is the maximum weight that your vehicle can safely tow, including the weight of the trailer and its contents. Always refer to these sources to ensure that you stay within the specified towing capacity.

5. Is it worth investing in a heavy-duty towing package for my Ford F-250?

If you frequently tow heavy loads, investing in a heavy-duty towing package can be worth it. This can include a larger radiator, upgraded suspension, and heavy-duty transmission cooler to help handle the extra load of towing. It can improve your vehicle’s towing capabilities and ensure optimal performance when towing heavy loads.

[ad_2]

Maximizing Towing with the Ford F-250

How to Check Mileage on Your Tesla

0

[ad_1]

In this article, we will discuss the different ways to check mileage on your Tesla. Whether you have a new or used Tesla, it’s essential to know how to track your mileage for maintenance and resale purposes. We will cover various methods to check your car’s mileage and provide you with a comprehensive guide to ensure you can easily keep track of your Tesla’s mileage.

How can I check the mileage on my Tesla?

Checking the mileage on your Tesla is a simple process. You can easily access the mileage information through the car’s display screen. Here’s how to do it:

1. Start by sitting in the driver’s seat and turning on your Tesla.

2. Navigate to the ‘Controls‘ menu on the display screen.

3. Select ‘Vehicle’ and then ‘Trip’ to view the mileage information for your Tesla.

Check Mileage on Your Tesla

Can I check the mileage on my Tesla remotely?

Yes, you can check the mileage on your Tesla remotely through the Tesla app. The Tesla app allows you to access various features and information about your car, including the mileage. Here’s how to check the mileage on your Tesla using the app:

1. Open the Tesla app on your smartphone and log in to your account.

2. Select your car from the list of vehicles associated with your account.

3. Navigate to the ‘Controls’ section of the app, where you can find the mileage information for your Tesla.

How do I keep track of the mileage for maintenance purposes?

To keep track of the mileage on your Tesla for maintenance purposes, you can use the ‘Trip’ feature on the car’s display screen. The ‘Trip’ feature allows you to record and reset the mileage for specific trips or maintenance intervals. Additionally, you can use the Tesla app to monitor the mileage and set reminders for regular maintenance check-ups.

Check Mileage on Your Tesla

Is the mileage on my Tesla accurate?

Yes, the mileage displayed on your Tesla is accurate and is tracked electronically by the car’s systems. The mileage information is stored and can be accessed through the display screen or the Tesla app. It’s important to note that any discrepancies in the mileage should be reported to Tesla for further investigation.

How can I ensure the accuracy of my Tesla’s mileage?

To ensure the accuracy of your Tesla’s mileage, it’s essential to regularly check and record the mileage using the methods mentioned above. Additionally, you can cross-reference the mileage displayed on the car’s screen with the mileage recorded in the Tesla app to ensure consistency and accuracy. If you notice any discrepancies, contact Tesla’s customer support for assistance.

Conclusion

Checking the mileage on your Tesla is a straightforward process that can be done through the car’s display screen or the Tesla app. It’s important to keep track of your car’s mileage for maintenance and resale purposes, and ensuring the accuracy of the mileage is crucial. By following the methods mentioned in this article, you can easily stay on top of your Tesla’s mileage and maintain its optimal performance.

Check Mileage on Your Tesla

FAQs

Q: Can I check the mileage on my Tesla using the car’s display screen?

A: Yes, you can check the mileage on your Tesla through the car’s display screen by navigating to the ‘Controls’ menu and selecting ‘Vehicle’ and then ‘Trip’ to view the mileage information.

Q: Can I check the mileage on my Tesla remotely?

A: Yes, you can check the mileage on your Tesla using the Tesla app, which allows you to access the mileage information and other features of your car remotely.

Q: How do I keep track of the mileage for maintenance purposes?

A: You can keep track of the mileage on your Tesla for maintenance purposes by using the ‘Trip’ feature on the car’s display screen and setting reminders for regular maintenance check-ups through the Tesla app.

Q: Is the mileage on my Tesla accurate?

A: Yes, the mileage displayed on your Tesla is accurate and tracked electronically by the car’s systems.

Q: How can I ensure the accuracy of my Tesla’s mileage?

A: To ensure the accuracy of your Tesla’s mileage, regularly check and record the mileage using the methods mentioned in this article and cross-reference the mileage displayed on the car’s screen with the Tesla app.


[ad_2]

Check the Mileage on Your Tesla

How Long Can You Delay Your Tesla Delivery?

0

[ad_1]

In this article, we will discuss the options available for How Long Can You Delay Your Tesla Delivery? Whether you have encountered unexpected circumstances or simply need more time to prepare for your new vehicle, understanding the process and potential timelines for delaying your Tesla delivery can provide peace of mind.

Can I Delay the Delivery of My Tesla?

Yes, you can delay the delivery of your Tesla. Tesla understands that unexpected events or changes in circumstances may arise, and they are often willing to accommodate customers’ needs. Whether you need a few extra days or several weeks, Tesla has a process in place to help you reschedule your delivery date.

If you find yourself in a situation where you need to delay your Tesla delivery, it is important to communicate with the company as soon as possible. Contact Tesla’s customer support team or reach out to your delivery advisor to discuss your situation and explore potential options for rescheduling.

Can You Delay Your Tesla Delivery

What Is the Process for Delaying My Tesla Delivery?

The process for delaying your Tesla delivery typically involves contacting the company and explaining your situation. Once you have communicated your need to reschedule, Tesla will work with you to identify a new delivery date that aligns with your availability and preferences. Depending on the circumstances, you may need to provide additional documentation or information to support your request for a delay.

Tesla’s customer support team and delivery advisors are there to assist you throughout the process, ensuring that you have a clear understanding of the steps involved and any potential implications of delaying your delivery. Keep in mind that the availability of specific delivery dates may vary based on factors such as production schedules and regional logistics.

How Long Can I Delay My Tesla Delivery?

The length of time you can delay your Tesla delivery may depend on various factors, including production timelines and inventory availability. While Tesla aims to be flexible and accommodating, there may be limitations on how far out you can postpone your delivery.

It is advisable to discuss your specific needs and circumstances with Tesla’s customer support team or delivery advisors to determine the maximum duration for delaying your delivery. By proactively engaging with the company and clearly articulating your situation, you can work together to find a suitable resolution.

What Are the Potential Implications of Delaying My Tesla Delivery?

Delaying your Tesla delivery may have implications related to vehicle registration, insurance coverage, and financial arrangements. It is important to consider these factors and ensure that you are prepared for any impacts resulting from a change in delivery timing.

When discussing the delay of your Tesla delivery with the company, be sure to inquire about any potential implications and seek guidance on how to address them. By staying informed and proactive, you can navigate the process with confidence and minimize any potential disruptions.

Conclusion

Delays in Tesla delivery are a common occurrence, and the company is typically willing to work with customers to find a suitable solution. By understanding the process for rescheduling and communicating your needs effectively, you can easily navigate the situation and ensure a smooth transition when the time comes to take delivery of your Tesla.

Can You Delay Your Tesla Delivery

FAQs

Can I cancel my Tesla order instead of delaying the delivery?

If you are considering canceling your Tesla order due to unforeseen circumstances, it is advisable to first explore the option of delaying the delivery. Canceling an order may have different implications, and it is recommended to discuss your specific situation with Tesla’s customer support team or delivery advisors.

What if my financial situation changes, and I need to delay my Tesla delivery for an extended period?

If your financial situation changes and you require an extended delay in your Tesla delivery, it is important to communicate with the company and explore the available options. Tesla may be able to work with you to find a suitable solution that aligns with your needs and circumstances.

Will delaying my Tesla delivery affect the warranty or service coverage?

Delaying your Tesla delivery should not have a direct impact on the warranty or service coverage of your vehicle. However, it is recommended to confirm this with Tesla’s customer support team or delivery advisors to ensure that you have a clear understanding of any potential implications.

What if I have already completed the payment for my Tesla, but now need to delay the delivery?

If you have already completed the payment for your Tesla but need to delay the delivery, it is essential to discuss your situation with the company. Tesla may be able to provide guidance on how to manage the payment in relation to the revised delivery timing.

Are there any additional fees or charges associated with delaying my Tesla delivery?

It is advisable to discuss any potential fees or charges related to delaying your Tesla delivery with the company’s representatives. While there may be certain considerations to be aware of, Tesla is typically willing to work with customers to find a mutually satisfactory solution.


[ad_2]

Can You Delay Your Tesla Delivery